

다운로드 → 옵션을 열거나 도구 모음에서 옵션을 클릭합니다. 창에는 두 줄의 탭에 12개의 페이지가 있습니다. 확인을 누르면 변경 사항이 저장되고, 창을 닫거나 Esc를 누르면 변경 사항이 취소됩니다.
일부 버튼은 회색으로 표시됩니다. 아직 구현되지 않은 기능에 속합니다.
일반


- Launch GolinksPRO Download Manager on startup — start GDM when you sign in to Windows. It starts in the notification area, its window hidden, with its downloads, queues and Scheduler running; click its icon (or start GDM again) to show the window. On Linux and macOS it starts with your session the same way; where no notification area shows GDM's icon (some Linux desktops), it starts minimized, and the option's tooltip says so. GDM waits for the notification area up to 30 seconds after making its icon, its window hidden, as a desktop's can come up after GDM at sign-in. Off by default. Greyed in a portable copy, which writes nothing to the registry.
- 클립보드에 복사된 링크 다운로드 제안 — 파일 형식 페이지에 있는 파일 형식의 링크를 복사하면 파일 정보 다운로드 창이 열리고 다운로드를 시작할 준비가 됩니다(또는 다운로드 시작 대화 상자 표시가 꺼져 있으면 다운로드가 즉시 시작됩니다). 이 기능은 압축 파일, 프로그램, 음악, 비디오, PDF 및 직접 추가한 모든 형식에만 적용되므로, 다른 곳에서 사용할 그림, 글꼴 또는 3D 모델의 주소를 복사해도 다운로드가 시작되지 않습니다. 기본적으로 켜져 있습니다.
- Use advanced browser integration — let the browser extension hand downloads to GDM. Turn it off to keep every download in the browser.
- 다운로드 삭제 전 확인 — 목록에서 다운로드를 제거하기 전에 확인합니다. 기본적으로 켜져 있으며, 해당 질문에서 이 대화 상자를 다시 표시 안 함을 선택하면 꺼지고, 여기에서 다시 선택하면 켜집니다.
- Keep running when closing the window — closing the main window hides it in the notification area instead of quitting, and downloads, queues and schedules go on. On by default; unticked, closing quits GDM (so a portable copy's folder can then be deleted). If there is no icon for GDM at all — not even behind the ^ hidden icons — the window minimizes to the taskbar instead, so downloads continue and the window stays reachable; an icon behind ^ can be clicked to bring it back, or start GDM again. Greyed where no tray shows GDM's icon (some Linux desktops): closing quits there.
- Minimize to the notification area — Minimize hides the main window, and a download's progress window, in the notification area; downloads go on. On by default. Where the tray has no icon, the main window minimizes to the taskbar instead. The close setting above is separate; when it is on, closing hides there too (or minimizes to the taskbar if there is no icon at all). Greyed where no tray shows GDM's icon (some Linux desktops); in a Wayland session the main window stays minimized in the dock, since Wayland can't hide a window.
- 다음 브라우저에서 다운로드 캡처 — 특정 브라우저의 다운로드를 그대로 두려면 해당 브라우저의 선택을 해제합니다.
- Customize GDM Download panels in browsers → Edit... — the download button over videos on web pages: turn it off, or list the sites it never shows on (separate them by spaces;
*.example.comcovers its subdomains). See Browser integration.
브라우저 통합을 참조하십시오.
파일 형식
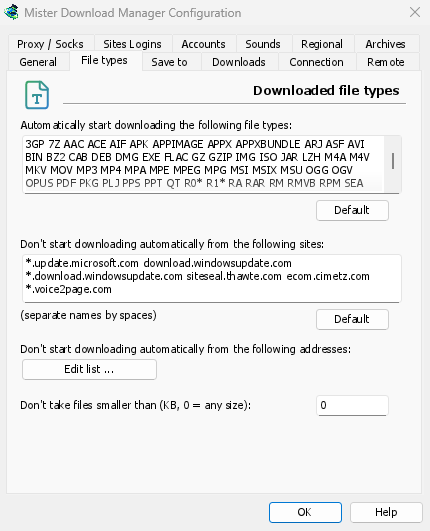
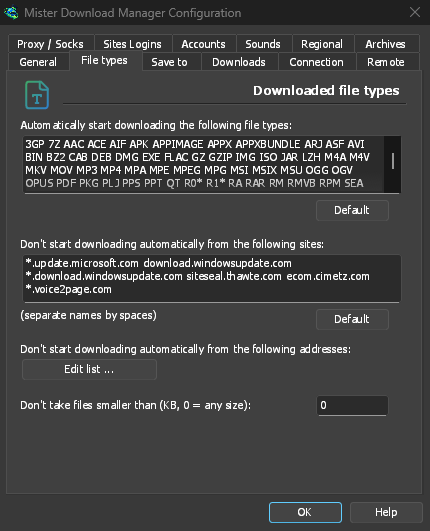
- 다음 파일 형식 자동 다운로드 시작 — 브라우저가 넘겨주는(그리고 클립보드가 가져오는) 파일 형식입니다. 공백으로 구분하며,
*는R0*처럼 모든 문자와 일치합니다. 기본값을 클릭하면 원래 목록으로 되돌아갑니다. 목록은 일반적인 압축 파일, 프로그램 및 설치 파일(Windows, macOS 및 Linux용: DMG, PKG, DEB, RPM, APPIMAGE, MSIX), 음악 및 비디오, PDF 및 Office 파일, AI 모델 및 데이터 세트(GGUF, SAFETENSORS, CKPT, PT, ONNX, PARQUET), 3D 및 CAD 파일(GLB, FBX, OBJ, STL, BLEND, STEP), 디자인 및 카메라 RAW 파일, 전자책, 디스크 이미지 및 분할 압축 파일로 시작합니다. 페이지, 스크립트, 일반 텍스트 및 웹 이미지는 의도적으로 제외되어 있으므로 그림이나 페이지 저장은 브라우저에서 처리됩니다. 필요한 형식을 추가하거나, 확장자가 있는 모든 파일을 가져오려면 상자에*하나를 입력하세요. 변경하지 않은 목록에는 새 버전이 추가하는 형식이 포함되고, 편집한 목록은 그대로 유지됩니다. - 다음 사이트에서 자동 다운로드 시작 안 함 — 다운로드가 브라우저에 남아 있는 사이트(공백으로 구분).
*.example.com는 사이트의 모든 부분을 포함합니다. 기본값은 원래 목록으로 되돌립니다.
저장 위치
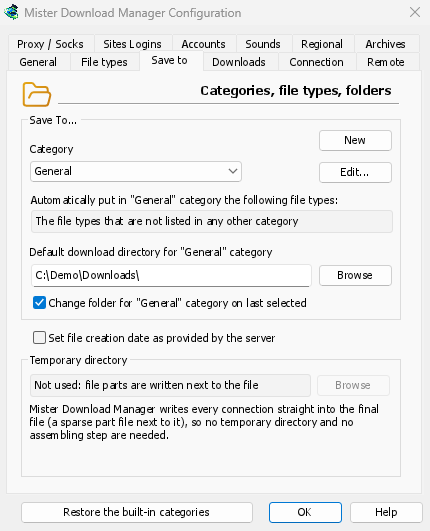
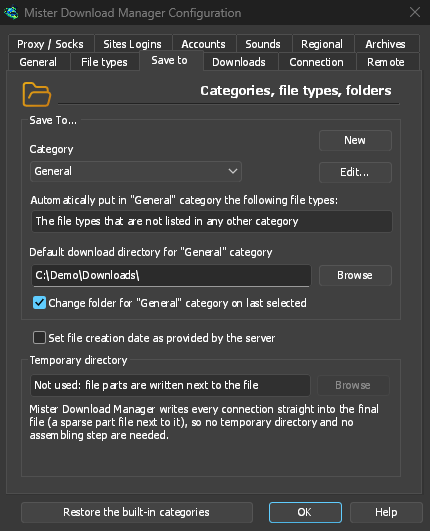
- 범주 — 아래에서 설정을 보고 변경할 범주를 선택합니다.
- 새로 만들기 — 나만의 범주를 만듭니다. 편집...은 선택한 범주의 이름, 파일 형식 및 폴더를 변경합니다. 기본 제공 범주(압축됨, 문서, 음악, 프로그램, 비디오)는 이름을 바꾸거나 다른 파일 형식을 지정하거나 직접 만든 범주처럼 삭제할 수 있습니다. 이름을 바꾼 범주는 폴더를 유지합니다. 일반 및 토렌트는 폴더만 변경할 수 있습니다.
- 기본 제공 범주 복원 — 이름을 바꾸거나 형식을 변경하거나 삭제한 기본 제공 범주를 원래 상태로 되돌립니다.
- 다음 파일 형식을 "…" 범주에 자동으로 넣기 — 이 범주로 이동하는 파일 형식입니다.
- "…" 범주의 기본 다운로드 디렉터리 — 범주의 폴더입니다. 경로를 입력하거나 찾아보기를 클릭합니다.
- 마지막으로 선택한 항목에 따라 "…" 범주의 폴더 변경 — 파일 정보 다운로드에서 다른 폴더를 선택하면, 그 폴더가 해당 범주의 폴더가 됩니다. 기본적으로 켜져 있습니다. (이것은 해당 창에서 이 경로 기억의 초기 상태를 설정합니다.)
- 서버에서 제공하는 파일 생성 날짜 설정 — 다운로드한 날짜가 아닌 서버가 보고한 날짜를 완료된 파일에 부여합니다.
GDM doesn't use a temporary folder: every connection writes straight into the final file's place, so there is nothing to put together at the end.
다운로드
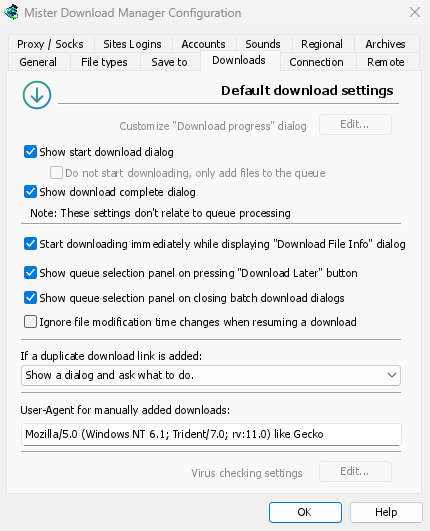
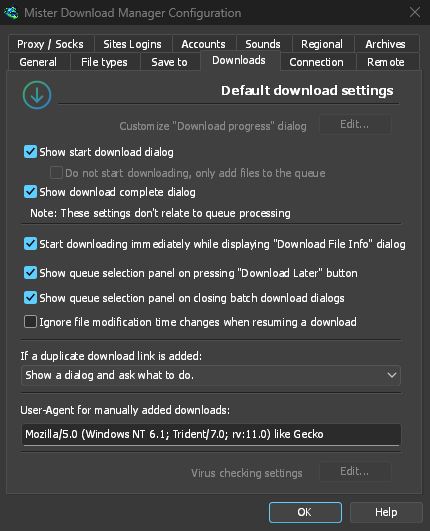
- 다운로드 시작 대화 상자 표시 — 새 다운로드마다 파일 정보 다운로드를 표시합니다. 이 기능이 꺼져 있으면 다운로드가 즉시 시작되거나, 다운로드를 시작하지 않고 파일만 큐에 추가를 선택한 경우에만 큐에 추가됩니다.
- 다운로드 완료 대화 상자 표시 — 파일이 완료되면 다운로드 완료를 표시합니다.
- "파일 정보 다운로드" 대화 상자를 표시하는 동안 즉시 다운로드 시작 — 기본적으로 켜져 있으므로 폴더를 선택하는 동안에도 다운로드가 이미 진행 중입니다.
- "나중에 다운로드" 버튼을 누를 때 큐 선택 패널 표시 — 넣을 대기열을 묻습니다. 끄면 기본 다운로드 대기열에 넣습니다.
- 일괄 다운로드 대화 상자를 닫을 때 큐 선택 패널 표시 — 일괄 다운로드의 경우에도 동일합니다.
- 다운로드 재개 시 파일 수정 시간 변경 무시 — 같은 파일에 대해 매번 새로운 날짜를 보고하는 서버에 유용합니다. 이 옵션을 사용하지 않으면 이러한 서버에서는 다운로드를 재개할 때마다 처음부터 다시 시작합니다.
- 중복 다운로드 링크가 추가된 경우 — 확인하거나, 이름에 번호를 붙여 추가하거나, 기존 파일을 덮어쓰거나, 완료된 파일을 열거나 미완료된 다운로드를 재개하도록 선택합니다.
- User-Agent for manually added downloads — how GDM names itself to servers for downloads you add yourself. Downloads from the browser use the browser's own User-Agent.
연결


- 기본 최대 연결 수 — 다운로드 하나에 사용할 수 있는 연결 수입니다. 1~32까지 설정할 수 있으며 기본값은 8입니다. 숫자를 입력하거나 화살표를 사용하세요.
- Allow more than 32 connections — raises the most to 128, for the number above and for the exceptions. Most servers allow far fewer from one address; GDM notices and asks those for fewer. Turned off again, any higher number comes back to 32.
- Exceptions — a different number for some servers. New adds one (the server's name and the number of connections); Edit and Delete change or remove the selected one. Rows marked (auto) are limits GDM learned by itself from servers that refused more connections. They can't be edited and fade away by themselves.
- 다운로드 제한 — 몇 시간마다 다운로드할 양을 설정합니다. 예약 관리자에서도 같은 설정을 사용할 수 있습니다. 대기열 및 예약 관리자를 참조하세요.
- DNS — which DNS turns the servers' names into addresses for GDM's downloads, its own downloads (helpers, updates) and FTP. The system's DNS is the default (on Windows 11 it can already be encrypted, in Windows' own network settings). Or pick Cloudflare, Google, Quad9, AdGuard or NextDNS, or Another DNS... to type your own; Settings... chooses how it's asked:
- HTTPS를 통한 DNS(기본값) 또는 TLS를 통한 DNS: 암호화되어 중간에서 조회한 이름을 보거나 변경할 수 없습니다.
- Plain DNS: not encrypted. GDM asks it over TCP, never UDP, so it never needs a firewall exception.
- 사용자 지정 DNS를 설정하려면 서버의 IP 주소, 인증서에 표시되는 이름(TLS) 또는
https://주소(HTTPS)를 입력합니다. 알고 있는 경우 IP 주소도 입력하세요. NextDNS에는 구성 ID를 입력합니다. - 연결할 수 없는 경우 시스템 DNS 사용: 기본적으로 꺼져 있습니다. 따라서 DNS가 응답하지 않으면 시스템 DNS에 조회 내용을 노출하지 않고, 해당 DNS의 이름을 표시하며 다운로드를 중지합니다. DNS에서 존재하지 않는다고 응답한 이름에는 시스템 DNS를 사용하지 않습니다(필터링 DNS의 기능을 무효화하기 때문입니다).
- 테스트를 누르면 github.com에 요청하고 걸린 시간을 표시합니다.
호스트 파일의 이름과 로컬 이름(단일 단어, .local, .lan, .home.arpa, .internal, localhost)은 시스템 DNS를 사용합니다. 비디오 페이지(yt-dlp) 및 이미지 갤러리(gallery-dl)는 네트워크 어댑터가 선택된 경우에만 선택한 DNS를 사용합니다. 그렇지 않으면 토렌트 트래커처럼 시스템 DNS를 사용합니다. 프록시를 사용하는 경우 프록시가 사용자를 대신하여 연결하는 사이트의 이름을 조회합니다.
연결 및 속도에서 자세히 알아보세요.
프록시/SOCKS


- 프록시/SOCKS 없음 — 직접 연결합니다. 기본값입니다.
- 시스템 설정 사용 — 시스템 프록시를 사용합니다. Windows 또는 macOS 설정, 또는 Linux에서는 세션의
https_proxy,http_proxy및all_proxy변수를 사용합니다. - Use automatic configuration script — the proxy auto-config (PAC) script your network gives: type its address (
http://…/proxy.pac, or a file). GDM fetches it and asks it which proxy each download goes through (PROXY,SOCKSorDIRECT), as browsers do. Until it has been fetched, or if it can't be, GDM uses the system's settings. - 수동 프록시/SOCKS 구성 — 프록시 주소와 포트를 입력합니다. 필요한 경우 사용자 이름과 암호도 입력한 다음, 프록시에서 사용할 프로토콜(http, https)을 선택합니다. SOCKS 프록시의 경우 주소를
socks5://host형식으로 입력합니다. - 시스템 가져오기 — Windows의 프록시 설정에서 수동 필드를 채웁니다(Windows에서).
- Use proxy/socks from a browser's request… — on by default. A download GDM takes from the browser goes through the proxy the browser used for it. That's the one a VPN or proxy extension set, the browser's own manual proxy, or its proxy auto-config script. Without it, the download would leave from your own address, and content limited to the VPN's country, or to its address, would fail. The browser extension reads that proxy and hands it to GDM with each download, once you switch on Send downloads through this browser's proxy or VPN extension in the extension's toolbar popup (Firefox asks you once; Chrome, Edge, Brave, Opera and Vivaldi ask nothing more: see A VPN or proxy extension).
- VPN 확장 프로그램 자체가 제공하는 로그인 정보를 요구하는 프록시는 공유할 수 없습니다. 다른 프로그램은 해당 로그인 정보를 알 수 없기 때문입니다. 이 경우 프록시를 사용하지 않고 다운로드를 진행하는 대신 다운로드가 중지되고 그 이유가 표시됩니다. VPN 자체 앱을 사용하거나 네트워크 어댑터에서 해당 어댑터를 선택하세요.
- In Firefox, GDM sees the proxy the browser's own request for the file took, including the ones a VPN extension picks for each request. In Chrome and the other Chromium browsers, it sees the browser's proxy settings: the server for the download's scheme (honouring their bypass list) or their proxy auto-config script.
- When the browser used no proxy, and No proxy/socks is chosen, GDM uses Windows' proxy settings, as browsers do.
- Network adapter — Any (the system chooses) is the default. Pick an adapter, usually your VPN's, and every connection GDM opens goes out through it, or not at all. That covers downloads, FTP, torrents, video pages and image galleries, the DNS you chose, GDM's own downloads and the update check. It works as a kill switch: when the adapter disconnects, or the VPN is switched off, nothing goes out through your normal connection. Running downloads stop with "… is not connected" and start again when the adapter is back. The line under the list shows the adapter's address, or that it isn't connected.
- 작동 방식: Windows는 어댑터 자체 주소를 바인딩합니다. 그러면 Windows는 해당 패킷을 해당 어댑터를 통해서만 보냅니다(강력한 호스트 모델). Linux는 장치 자체를 바인딩하고(Linux 5.7 이상), macOS는 인터페이스를 바인딩합니다. 어댑터가 가지고 있지 않은 종류의 주소(IPv4 전용 VPN의 IPv6)는 거부되며, 우회하여 보내지지 않습니다.
- The system's DNS asks the names in its own way, and Windows may ask over every adapter. To keep the names inside the adapter too, choose a DNS under Connection → DNS: GDM then asks it through the adapter.
- Video pages and image galleries: yt-dlp, gallery-dl and the ffmpeg yt-dlp starts can't be held to an adapter themselves, so while one is chosen GDM gives them a proxy of its own on this computer (
127.0.0.1, with a password only they get). GDM opens their connections through the adapter, as it opens its own, and looks the names up with the DNS you chose. When the adapter disconnects, their connections close and the downloads stop with the others. Video formats that can't go through a proxy (RTMP, RTSP, MMS, FTP) are refused rather than sent around it. - 아직 어댑터에 바인딩되지 않아 어댑터를 선택하면 시작되지 않는 항목:
ftps://(암시적 TLS; TLS를 사용하는ftp://는 문제없습니다). - 이 컴퓨터 자체(
localhost)로 연결되는 경우에는 바인딩되지 않습니다. 이 컴퓨터의 프록시가 다운로드를 전달하며, 어디로 보낼지는 프록시에 달려 있습니다. - macOS에서는 VPN이 다시 연결될 때 새 인터페이스를 사용할 수 있습니다(
utun5대신utun4). 이 경우 해당 인터페이스를 다시 선택하세요. - Use FTP in PASV mode — on by default: for FTP downloads GDM opens the data connections itself (passive mode), which works through routers and firewalls. Turn it off only for a server that needs active mode (the server connects back to you). FTP never goes through the proxy above, so its ftp box stays greyed. See FTP and FTPS.
사이트 로그인
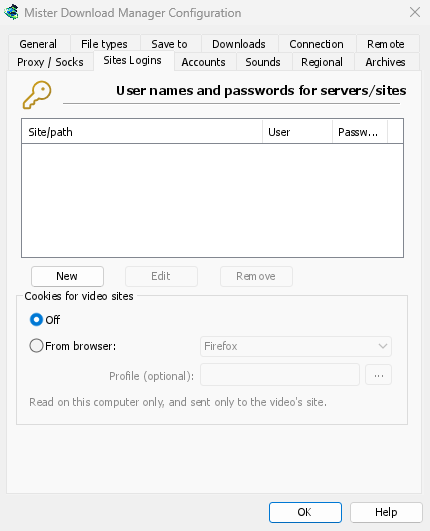
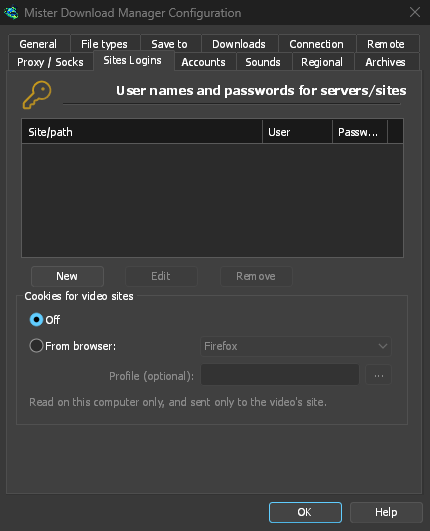
User names and passwords for sites that ask for them. New adds a row: the site (with a path if the login is only for part of it), the user name and the password. Edit and Remove change or delete the selected row. GDM uses the login for every download from that site. A login typed in Add URL (Use authorization) takes priority for that one download.
The passwords (these, the proxy's and the debrid accounts') are kept in the system's keychain: Windows Credential Manager, the keyring on Linux (Secret Service: GNOME Keyring, KeePassXC and others) or the macOS keychain; GDM's settings keep only a reference. A locked keyring is never unlocked for GDM: without one, they stay in GDM's settings, sealed for your Windows account on Windows. Options → Accounts says where they are. A portable copy keeps them in its own folder.
동영상 사이트용 쿠키 — 로그인해야만 재생되는 동영상(YouTube의 "로봇이 아님을 확인하려면 로그인하세요")의 경우:
- 끔(기본값) — 동영상 위에 있는 버튼을 사용할 때 yt-dlp는 브라우저 확장 프로그램에서만 쿠키를 가져옵니다.
- 브라우저에서 — yt-dlp는 붙여넣은 주소를 포함하여 조회하거나 다운로드하는 모든 동영상에 대해 이 컴퓨터에 있는 선택한 브라우저(Firefox, Chrome, Edge, Brave, Opera, Vivaldi, Chromium, Whale; macOS의 Safari)의 쿠키를 읽습니다. 확장 프로그램이 페이지 자체의 쿠키를 전달한 경우, 해당 쿠키가 대신 사용됩니다. 프로필(선택 사항): 프로필 이름 또는 폴더(...를 클릭하여 선택); 비어 있으면 마지막으로 사용된 프로필이 사용됩니다. Chrome, Edge 및 Brave는 Windows에서 쿠키를 잠급니다. Firefox는 작동합니다. 로그인을 요구하는 사이트를 참조하세요.
계정


디브리드 서비스 계정(Real-Debrid, AllDebrid, Premiumize; 실험적): 추가...를 누르면 브라우저에서 코드로 로그인하거나 API 토큰 또는 키를 사용할 수 있습니다. 이후 해당 서비스가 지원하는 호스트의 링크는 서비스를 통해 다운로드됩니다. 계정은 목록에 표시된 순서대로 시도됩니다. 디브리드 서비스 계정을 참조하세요.
사운드
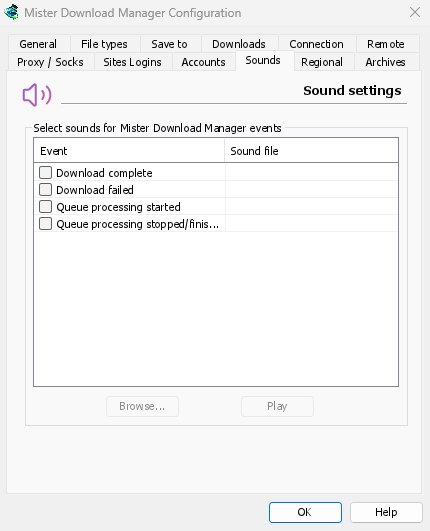
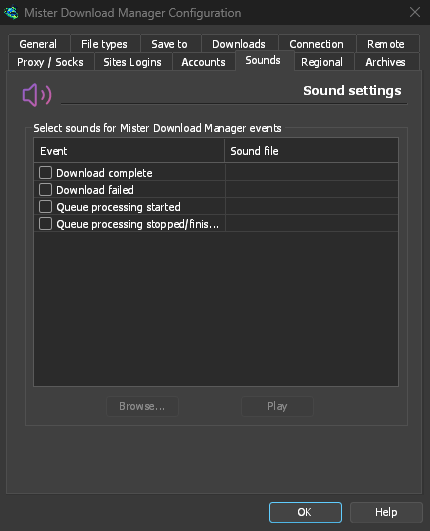
다운로드 완료, 다운로드 실패, 대기열 처리 시작됨 및 대기열 처리 중지됨/완료됨 이벤트에 사운드를 재생합니다. 이벤트를 체크하고 선택한 다음 찾아보기...를 눌러 .wav 파일을 선택하세요. 소리를 들으려면 재생을 누르세요.
지역
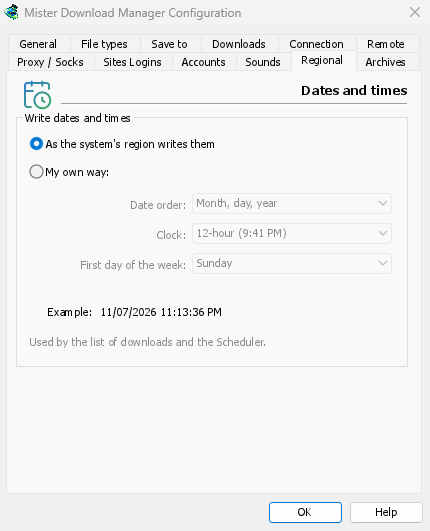
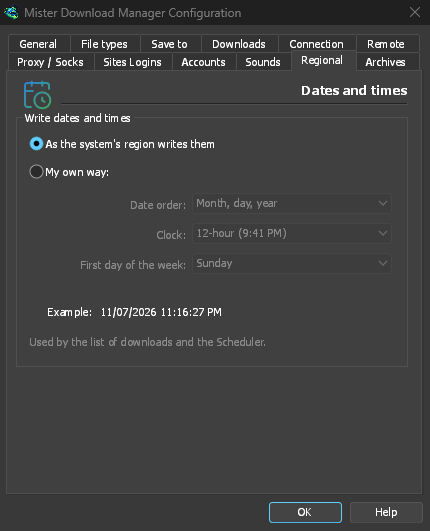
다운로드 목록과 예약 관리자에서 날짜와 시간을 표시하는 방식입니다.
- 시스템 지역 설정에 따름(기본값) — Windows의 지역 설정(설정 → 시간 및 언어 → 지역)을 사용합니다. macOS 및 Linux에서는 해당 언어의 일반적인 표기 방식을 사용합니다. 영어에서는 목록에 IDM 고유의 날짜 형식을 사용합니다.
- 내 방식 — 날짜 순서(일, 월, 년; 월, 일, 년; 또는 년, 월, 일), 12시간제 또는 24시간제, 예약 관리자 달력의 주의 첫째 날을 선택합니다. 예시에서 결과를 확인할 수 있습니다.
압축 파일


압축 파일(zip, 7z, rar, tar, gz, xz) 및 링크 그래버.
- 다운로드 완료 시 압축 파일 추출(기본적으로 꺼져 있음) — 다운로드한 모든 압축 파일을 다운로드가 완료되는 즉시 추출합니다. 분할 압축 파일은 마지막 볼륨이 다운로드되면 추출합니다. 링크 그래버 패키지에는 별도의 완료 시 추출 설정이 있습니다.
- 그런 다음 압축 파일을 휴지통으로 이동(기본적으로 꺼져 있음; macOS 및 Linux에서는 휴지통) — 추출이 성공한 경우에만 이동합니다. 새 패키지의 추출 후 압축 파일 삭제도 기본적으로 이 설정을 사용합니다.
- 압축 파일 내용 저장 위치 — 여러 항목이 들어 있는 경우 압축 파일 이름의 폴더에 저장(기본값), 항상 압축 파일 이름의 폴더에 저장, 또는 압축 파일이 있는 폴더에 바로 저장합니다.
- 7-Zip을 찾았는지 여부: 7z 및 RAR 압축 파일에 필요합니다.
- 링크 도착 시 조회(이름, 크기, 온라인) — 링크 그래버가 각 서버에 파일 정보를 조회합니다(기본적으로 켜져 있음).
- 웹 페이지 숨기기 — 링크 그래버의 동일한 상자에 대한 기본값(켜짐).
원격
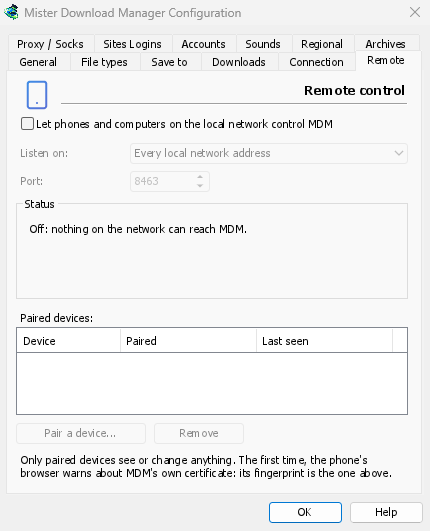
Control GDM from your phone or another computer on the local network: see Control GDM from your phone.
- Let phones and computers on the local network control GDM (off by default).
- 수신 대기 — 모든 로컬 네트워크 주소(기본값), 이 컴퓨터만 또는 하나의 주소.
- 포트 — 기본적으로 8463.
- 상태 — 현재 수행 중인 작업, 휴대폰에서 열 주소 및 인증서의 지문.
- 페어링된 장치 — 장치 페어링…은 QR 코드와 코드를 표시합니다. 제거는 선택한 장치를 즉시 페어링 해제합니다.
기타
이 창 밖에 있는 몇 가지 설정:
- 다운로드 → 속도 제한 → 설정... — 속도 제한입니다. 연결 및 속도를 참조하십시오.
- 작업 → 토렌트 설정... — 공유 및 파일 연결입니다. 토렌트를 참조하십시오.
- 보기 → 다크 모드 지원, 항상 어둡게, 테마, 다음으로 그리기, 인터페이스 크기 및 언어. 시작하기 및 문제 해결을 참조하세요.
- 도움말 → 업데이트 확인... — 해당 창에서 시작할 때마다 업데이트 확인을 설정할 수 있습니다.
다음 단계
무료, 오픈 소스, 광고 없음, 평가판 없음.
Download GolinksPRO Download Manager